Backyard Harvest Playbook: Growing Vegetables That Actually Thrive
Growing your own vegetables doesn’t have to be picture-perfect to be worth it. A slightly crooked tomato, a funny-shaped carrot, or a cabbage with a few nibbled leaves can still taste incredible—and that’s what YardPiq is all about: real-life yards, real-life harvests, and real-life wins. This guide walks you through practical, beginner-friendly veggie growing, season by season, so you can enjoy homegrown food without needing a “perfect” garden.
Start Where You Are: Planning a Realistic Veggie Patch
Before you buy a single seed packet, take a few minutes to map out what’s actually doable for your space and schedule.
Look at your sun. Most vegetables need 6–8 hours of direct sunlight, especially fruiting crops like tomatoes, peppers, and cucumbers. Leafy greens and herbs can get by with 4–6 hours and a bit of light shade in hot climates. Watch where the sun falls for a day or two and pick the brightest, least-blocked spot you have.
Think about your time. If you’re busy, start with low-maintenance crops like bush beans, leaf lettuce, radishes, and zucchini. Skip high-attention divas (like giant heirloom tomatoes in a cold climate) until you’ve got a year under your belt.
Choose your growing style: in-ground beds, raised beds, or containers. Containers are perfect for patios and renters: cherry tomatoes, salad greens, peppers, and herbs all grow happily in pots. Raised beds warm up faster in spring and are great if your soil is rocky, compacted, or very clay-heavy.
Finally, pick vegetables you actually like to eat. It sounds obvious, but it’s easy to get carried away by seed catalogs. If your family loves salads and tacos, think lettuce, cherry tomatoes, cilantro, peppers, and green onions. If you’re big on stir-fries, grow bok choy, snap peas, scallions, and broccoli.
Building Better Soil: The Secret Ingredient to Happy Vegetables
Healthy soil is the quiet engine of every productive vegetable garden. Even the best seeds will struggle if they’re planted in compacted, nutrient-poor dirt.
Start by checking drainage. After a heavy watering, the soil should feel moist but not swampy and should drain within a few hours. If you see standing water, consider raised beds or mounded rows so roots don’t suffocate.
Add organic matter—compost, aged manure, or leaf mold—to almost any soil. It improves sandy soil by helping it hold moisture and loosens up heavy clay so roots can breathe. A simple rule of thumb: mix 2–3 inches of compost into the top 6–8 inches of soil before planting each season.
If you can, use a basic soil test kit or send a sample to your local cooperative extension service. You’ll know your pH (how acidic or alkaline your soil is) and which nutrients you’re short on, so you’re not guessing with fertilizers.
Aim to keep soil covered. Bare soil dries out quickly and erodes. Use mulch—like straw (not hay), shredded leaves, or grass clippings (untreated by chemicals)—between rows and around plants. It helps retain moisture, keeps weeds down, and slowly feeds the soil as it breaks down.
Over time, try to avoid heavy, deep tilling. Gentle mixing on the top few inches and adding compost annually encourages soil life—earthworms, fungi, and beneficial microbes—that support strong, resilient plants.
Cool-Season Veggies: Getting a Head Start in Spring
Cool-season vegetables are your early birds—they prefer mild temperatures and can handle a bit of chill. Working with these crops lets you start harvesting weeks before summer arrives.
Good cool-season choices include lettuce, spinach, kale, radishes, peas, carrots, beets, broccoli, cabbage, and green onions. Many of these can be sown directly into the soil as soon as it’s workable and not soggy.
For a head start, pre-warm your soil by covering the bed with a dark tarp or plastic a couple of weeks before planting in early spring. Once temperatures stabilize, sow seeds in shallow furrows, lightly cover with soil, and water gently.
Pay attention to spacing. It’s tempting to cram seeds in, but crowded plants compete for light and nutrients and stay smaller. Follow the seed packet guidelines, but remember you can “thin” seedlings later by snipping extra sprouts at soil level and using them as microgreens.
Cool-season crops appreciate consistent moisture. Their shallow roots dry out faster in windy, cool weather than you’d expect. Water when the top inch of soil is dry and add a thin layer of mulch once seedlings are a few inches tall.
As the weather warms, many cool-season plants may “bolt” (flower and go to seed). To slow this down, give them light shade during hot afternoons using shade cloth, a patio umbrella, or taller plants nearby. Harvest often—baby leaves of lettuce or spinach are tender and tasty and can be picked repeatedly.
Warm-Season Workhorses: Summer Vegetable Success
Warm-season vegetables need soil and air that feel more like summer vacation than spring jacket weather. Plant them too early in cold soil, and they’ll sulk instead of grow.
Classic warm-season crops include tomatoes, peppers, eggplant, cucumbers, squash, zucchini, beans, melons, and corn. Most of these are planted after your last expected frost date, when nighttime temperatures consistently stay above about 50°F (10°C).
In cooler climates, start tomatoes, peppers, and eggplant indoors 6–8 weeks before planting out, or buy sturdy seedlings from a local nursery. Look for stocky plants with dark green leaves and no flowers yet—they transplant more smoothly.
Give warm-season vegetables room and support. Tomatoes and cucumbers benefit from cages, stakes, or trellises; keeping them off the ground improves airflow and reduces disease. Bush beans and bush squash stay more compact and are great for smaller spaces and containers.
Feed these heavy feeders with a balanced, slow-release organic fertilizer at planting and again midseason, following package directions. For fruiting crops like tomatoes and peppers, avoid overdoing nitrogen-rich fertilizers—that boosts leaves at the expense of flowers and fruits.
Monitor soil moisture carefully in summer. Deep, infrequent watering (aiming for about 1 inch of water per week, including rain) encourages strong roots. Water early in the morning at soil level to minimize evaporation and leaf disease. A 2–3 inch layer of mulch does a lot of the heavy lifting for you in hot weather.
Smart Watering, Mulching, and Everyday Plant Care
Daily care doesn’t have to be complicated, but staying consistent beats trying to “catch up” after problems appear.
Check soil moisture with the finger test: insert your finger to your second knuckle. If it feels dry at that depth, it’s time to water. Aim for slow, soaking water at the base of plants rather than quick sprinkles that only dampen the surface.
Mulch is your best low-effort tool. Around most vegetables, leave a small mulch-free ring right at the stem to prevent rot, then spread mulch out 2–3 inches deep. Straw, shredded leaves, or untreated grass clippings work well; avoid piling mulch against stems.
Keep an eye on plant leaves. Yellowing, stunted growth, or distorted leaves can signal nutrient issues, water stress, or pests. Often, adjusting watering and adding compost does more good than immediately reaching for a spray.
Weed regularly, especially while plants are small. Weeds compete for nutrients and water, and some host pests. A quick 5–10 minute session every few days is usually enough to stay ahead.
Prune selectively. Remove any diseased, dead, or badly damaged leaves as you see them. For indeterminate (vining) tomatoes, you can pinch off “suckers” (small shoots between the main stem and branches) if you want a more open, manageable plant, though it’s optional for home gardens.
Pests, Problems, and How to Stay (Mostly) Calm
Even in a well-tended vegetable garden, you’ll eventually spot a few holes in leaves or an unexpected insect visitor. The goal isn’t perfection; it’s balance.
Start by observing before acting. Many garden insects are beneficial or neutral, and a single pest sighting doesn’t always justify treatment. Look for patterns: lots of caterpillars, clusters of aphids, or leaves being skeletonized.
Encourage natural allies. Ladybugs, lacewings, and birds help keep pest populations in check. Flowering plants like marigolds, dill, cosmos, and alyssum near your veggies attract beneficial insects that prey on pests.
Use physical barriers first. Floating row covers (lightweight fabric) can protect young plants from common pests like cabbage worms and flea beetles. Hand-picking larger pests—like tomato hornworms or slugs—can be surprisingly effective in a small garden.
If you decide to use a spray, start with the gentlest options and follow labels carefully. Insecticidal soaps or neem oil can help against soft-bodied insects like aphids when used properly. Avoid spraying during the hottest part of the day or when pollinators are active.
Practice crop rotation from year to year when possible. Don’t grow the same plant family in the exact same spot two seasons in a row. For example, rotate tomatoes, peppers, and eggplant (all in the nightshade family) to a different bed the next year to help reduce disease build-up and soil nutrient imbalances.
Year-Round Rhythm: Extending Your Vegetable Season
With a bit of planning, your garden can produce something almost every month of the growing year, not just in peak summer.
In early spring, focus on fast cool-weather crops like radishes, spinach, lettuce mixes, and peas. Sow them in succession—planting small batches every 1–2 weeks—so you don’t end up with everything ready at once and then nothing.
As the soil warms, tuck in warm-season seedlings between or after spring crops. When your peas start to fade in early summer, that row is perfect for bush beans or a second round of zucchini.
In late summer, think “second spring.” Many cool-season crops can be planted again for a fall harvest. Depending on your climate, sow kale, spinach, radishes, and lettuce about 6–10 weeks before your first expected fall frost.
Use simple season extenders. A low tunnel made from hoops and clear plastic or fabric row cover can protect plants from early light frosts and keep soil a bit warmer, buying you extra weeks of harvest in both spring and fall.
In regions with mild winters, consider winter crops like garlic (planted in fall), overwintering onions, and cold-hardy greens such as mache or certain kales. A small cold frame (a box with a clear lid) can keep salad greens going when the rest of the yard looks dormant.
Harvesting and Enjoying What You Grow
Harvest timing is more forgiving than you might think, and many vegetables are delicious at multiple stages of growth.
For leafy greens like lettuce, kale, and spinach, you can “cut-and-come-again”: snip outer leaves and let the center continue growing. This gives you multiple harvests from the same plant. Harvest in the cool of the morning for crisp, sweet leaves.
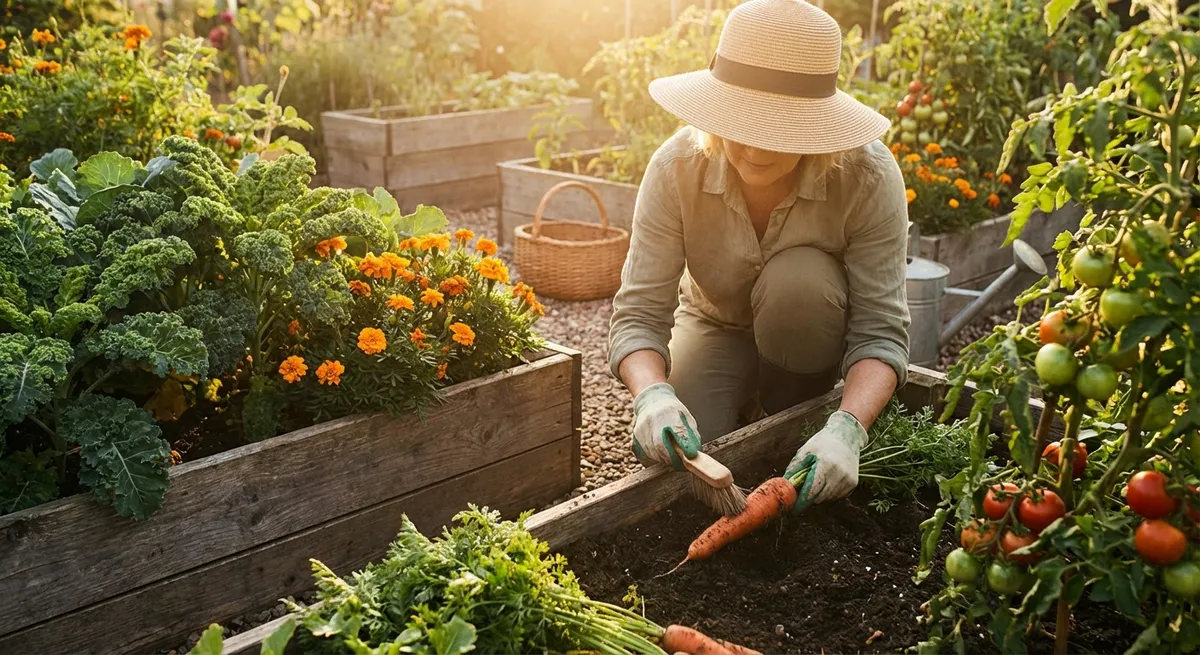
Root crops offer clues. Radishes and beets often show a bit of their shoulders above the soil when they’re close to ready. Carrots can be checked by gently brushing away some soil from the top to see their width. If they’re big enough for you, they’re ready.
Tomatoes are best picked when fully colored and slightly soft to the touch. If frost is coming, you can pick mature green tomatoes and let them ripen indoors in a warm, bright spot. Peppers can be eaten green or allowed to fully color up for sweeter flavor.
Zucchini and summer squash taste best when smaller—usually 6–8 inches long. Check plants often; they can go from “perfect” to “gigantic” in just a couple of days.
After harvesting, cool your vegetables quickly if possible, especially leafy greens. A rinse in cool water and a spin or gentle pat dry helps them store better. Even a small, imperfect harvest is something to celebrate—you grew food from your own yard, and that’s an achievement worth enjoying.
Conclusion
You don’t need a huge yard, expensive tools, or years of experience to grow vegetables that you’re proud to serve at your table. By paying attention to your seasons, building healthier soil, watering wisely, and starting with a handful of reliable crops, you’ll learn exactly what works in your unique space.
Each season teaches you something new—about your climate, your soil, and your own gardening style. Embrace the experiments, the surprises, and even a few flops. Those “failures” are often the best teachers, and with every seed you plant, you’re getting closer to a backyard harvest that truly fits your real life.
Sources
- [USDA Home Gardening](https://www.usda.gov/media/blog/archive/tag/home-gardening) - General guidance on home gardening, soil, and growing food from the U.S. Department of Agriculture
- [University of Minnesota Extension – Vegetables](https://extension.umn.edu/find-plants/vegetables) - Detailed, research-based advice on growing a wide range of vegetables, including planting times and care
- [Royal Horticultural Society – Grow Your Own Vegetables](https://www.rhs.org.uk/vegetables) - Practical how-tos, crop profiles, and pest/disease information from a major horticultural organization
- [Old Farmer’s Almanac – Frost Dates Calculator](https://www.almanac.com/gardening/frostdates) - Helps you determine local frost dates to time planting of cool- and warm-season veggies
- [UC ANR – Integrated Pest Management for Vegetables](https://ipm.ucanr.edu/home-and-landscape/vegetables/index.html) - University of California’s science-based recommendations for managing vegetable garden pests with minimal chemicals